O-training with OCAD
Lern how to start with an easy Course Setting Project.
Discover new sophisticated o-technical excercises.
Get background information for Course Setting.
Tutorials
The following PDF's contain the basic workflow of a Course Setting Project and can be used for workshops.
Preparation
Set up a Course Setting Project
For a Course Setting Project, you need two OCAD files:
- A [Course Setting File]
This is the file where manage your Course Setting Project, set courses and load a Background Map.
Like map files it has the extension .ocd, but it has a special internal mark to identify it as a course setting file.
- A [Map File]
This is your OCAD map which will be loaded as Background map in your [Course Setting File].
![]() You can also load a raster image (PNG, JPG, ...) as Background Map. However, for the trainings described below, you need to modify your Background Map, so you need a OCAD file.
You can also load a raster image (PNG, JPG, ...) as Background Map. However, for the trainings described below, you need to modify your Background Map, so you need a OCAD file.
Now start a New Coure Setting Project. Make sure the map scale of your [Course Setting File] is the same as your [Map File].
Correct Scale
It sometimes happens, that your course setting project and your background map have different scales without noticing it.
Generally, OCAD checks if the Background Map comes in the same scale as the course setting project and in case the scales are different, there will be an Error Message.

Check the scale of your course setting project under Map>Set Scale and Coodinate System.
Check the scale of your background map under Background Map>Manage. Click on the Information Icon behind the Backgound Map.
To be really sure that the scale is correct:
- Messure a line in OCAD and Google Maps and compare them.
- If your background map is georeferenced, you can export your courses in KMZ format and open them in Google Earth (File>Open Recently Exported Documents). There you see if your map corresponds with the terrain.
Different Scales and Layouts
In the ISOM 2017, the 1:10'000 map is defined as a 150% magnification of the 1:15'000 map. This applies to all objects including course setting objects (e.g. control circles are 7.5mm for 10'000 and 5mm for 15'000; in the past all control circles were 6mm).
If your [Map File] is 1:15'000, you should start with the Course Setting 15 000 ISCD 2018 - ISOM 2017.ocd symbol set. For a [Map File] in 1:10'000, use the Course Setting 10 000 ISCD 2018 - ISOM 2017.ocd symbol set.
Let's assume our Background Map has the scale 1:10'000:
- Open the Course Setting 10 000 ISCD 2018 - ISOM 2017.ocd symbol set.
- If both 1:10'000 and 1:15'000 maps need to be printed (maybe even 1:7'500), the entire course setting shall be done in a 1:10'000 project. Use the Canvases function to export the courses in differnt scales and/or layouts.
Pimp your Symbol Set
Are you regulary setting courses for your club? Shall all trainings have a common layout, similar to Corporate Identity?
So, why not create your own Symbol Set and save it in the folder C:\Program Files\OCAD\OCAD 2018 Orienteering\Symbol? The Symbol Set will be on the list Load symbol set from if you open a new Course setting project for Orienteering.
How to copy symbols from one map to another can be read here.
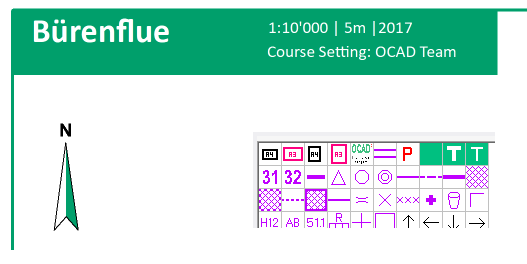
Example of the OCAD Symbol Set. A4/A3 frames, OCAD Logo, Corridor Symbol, Symbol for Parking, different Text Symbols.
Set Courses on a WMS / WMTS Layer
In OCAD, you can load a WMS / WMTS layer as a Background Map and set courses.
- Open a new Course Setting Project and save the project.
- Go to menu Background Map > WMS / WMTS.
- You will be asked to set a Coodinate System. Inform yourself in advance, what Coordinate System the WMS / WMTS layer has, which you like to load. E.g. if you like to load a swisstopo layer, you need to set the Swiss Grid CH1903+ / LV95. In our example, we search for EPSG code 3067 to set the Finnish coordinate system TM35FIN.
- Next, in the WMS / WMTS dialogue, select the FI-MapAnt WMS, which is pre-configured in OCAD, and click Connect.
- Now you can set courses on the MapAnt layer.
- Before exporting or printing the course, download the extent where you set the courses in png format to your local machine. Use the option Add User Defined Extent of Selected Layers to Background Maps (Offline) for that purpose.
- When you are done with your courses, export or print the courses.
Printing
The Course Setting Printing page provides an overview of how orienteering courses can be printed in different ways.
Tipps and Tricks
- Use the Compose Course tool for fast and easy course setting.
- Learn on the Route Analyzer page, how to analyze routes for sprint orienteering.
- Click on Add in the Course box to add a new course.
- To check your courses, use the Consistency Check Report under Menu>Course Setting>Consistencey Check Report
- Enter Text into the Text field of the Marked Route and make the Text Control Description smaller.
- Read here how to export all relay variations to one file.
- Pay attention to open/save Course Setting Files from OCAD 11 in OCAD 12 and vice versa, as many symbols and colors has changed between these two versions.
- Press Shift while adding a new contol and you will skip the course object dialog box.
- Add Conrtol by moving the connection line between two existing controls.
- When you select controls for courses by double-clicking on them, lock their position beforehand in order not to shift them.
Course Setting functions
See the Course Setting for Orienteering page to get information about all functions of the Course Setting module.
O-trainings
Simple Course
This short video shows you how to start a simple course, using the New Course Setting Project Wizard and the Compose Course tool.
Relay Courses
Learn all about Relays on the Create Relay Courses page.
Sprint Relay
For a Sprint Relay with four different legs, you have to create only one course with different Leg Variation and Team Variation.
- Open a new [Course Setting File], load your [Map File] as a Background Map.
- Go to the Course Setting Menu -> Courses and add a new Course. Choose Relay as Course type and enter the number of legs (typically 4 for Sprint Relays).
- Add controls to your project and choose your Course afterwards in the Course Box.
- Insert a Team Variation: Each runner of the team gets a different variation, for example for the first control.
- Insert a Leg Variation: A leg variation means that there is a variation of the legs within the same team. In a Sprint Relay, Women are running typically the 1st and 4th leg, whereas Men are running the 2nd and 3rd leg. To make the Men legs longer, use a Leg Variation.
Learn all about Relays in general on the Create Relay Courses page.
Butterfly
In OCAD you can create butterflys in different ways:
Create new course for each variant
- Create a Course with a butterfly in it.
- Duplicate the course.
- Edit the duplicated course, so the butterfly goes the other way round.
Use Team and Leg variation
- In the Courses dialog, define Relay as Course type and specify the number of legs. For a butterfly with 2 wings, it will be 2 legs. For a butterfly with 3 wings, it will be 6 (as there are 6 differnt ways to run the butterfly).
- In the Classes dialog, specify the start number range.
- Use Team and Leg variation to define the course as shown in the pictures below.
2 butterflies with 2 wings
1 diamond/phi loop with 2 variants and 1 butterfly with 3 wings
- When exporting the course, make sure to only export leg 1.
- Be aware that in case you export the courses to timing/event software, it will generate the course for all legs. In the export file need then to delete all legs except the first legs.
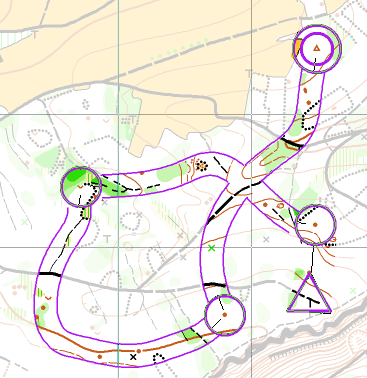
Corridor
- Open a new [Course Setting File] and load your [Map File] as a Background Map.
- Choose New in the Symbol Menu and create a new Line Symbol.
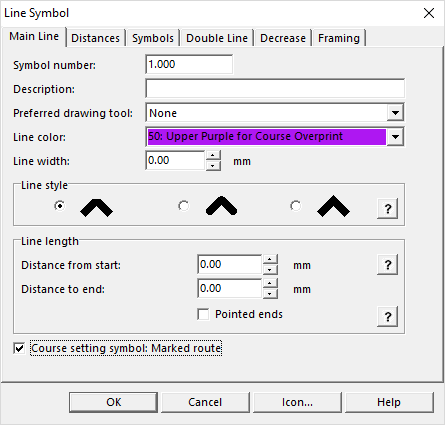
- - In the Mail Line tab, activate Course setting symbol: Marked route.
- - In the Double Line tab, choose the desired width of the corridor (e.g. 4mm) and the border lines.
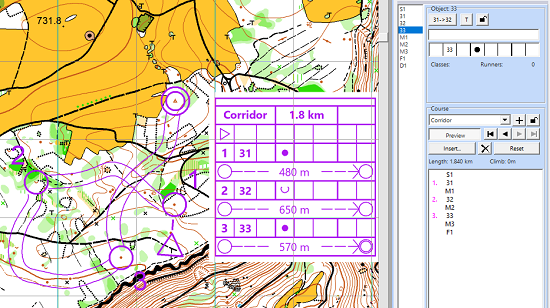
- Draw your corridor. Each corridor will appear as a Mared Route in the Course Setting Box. Insert the corridors in your course.
- Edit your corridor in a next step.
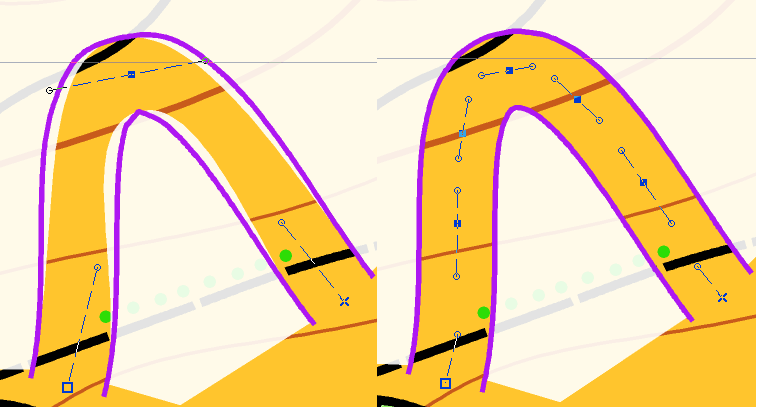
- - If needed, Cut overlapping parts.
- - Insert additional vertices in sharp turns.
- Cover the remaining parts with white.
- - Use the White background (Symbol 760) to cover the remaining parts of the map.
- - Activate Follow existing objects under Options> OCAD Preferences> Drawin and Editing to enable line following for double lines (hold the Ctrl button) (not available in CS Edition).
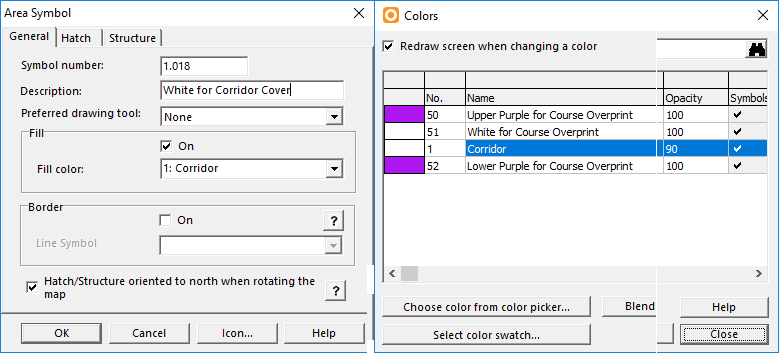
- - Instead of using White background (Symbol 760) for covering, first define a new white color (Map>Colors>Add) and then create a new area symbol (Symbol>New>Area Symbol) where you use this color as Fill Color. Like this you can set the Opacity of the white color to e.g. 90%, so you are not completly lost when leaving the corridor.
Reduce Map
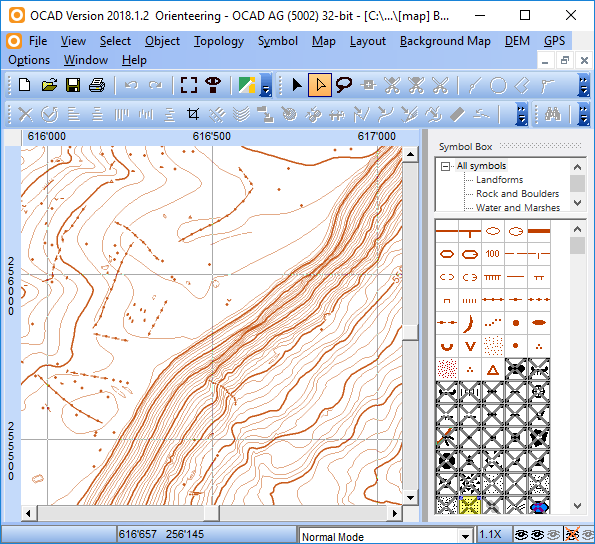
- Open your [Map File].
- Select the symbols you want to hide in the Symbol Box and go to Symbol>Hide Object or simply press F4.
- Save the map, load it as Background Map in your [Course Setting File] and set courses.
Multitechnique
- Open your [Map File].
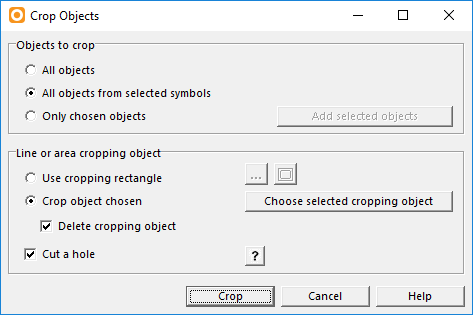
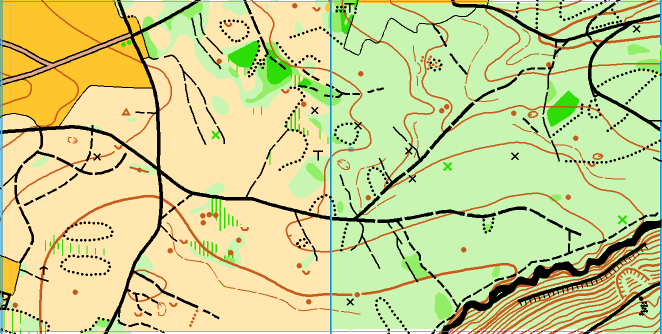
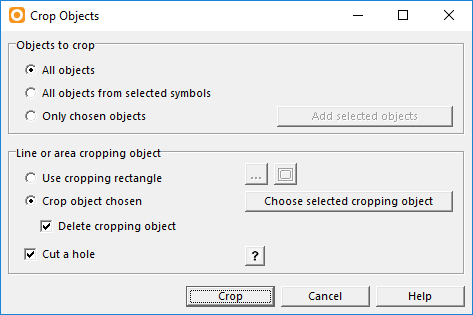
- Use the Crop funtion to differ which symbols you want to crop in which parts of your map. See an Animation how to use the Crop funktionCrop.
In the following example, we used the yellow and green areas as Crop Objects. In the yellow part, all paths and roads were cropped. In the green area, all terrain objects. You can use the Crop funktion as often as you like in the same [Map File].
- Save the map, load it as Background Map in your [Course Setting File] and set courses.
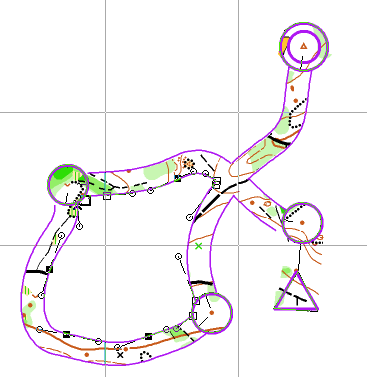
Island O
- Open your [Map File].
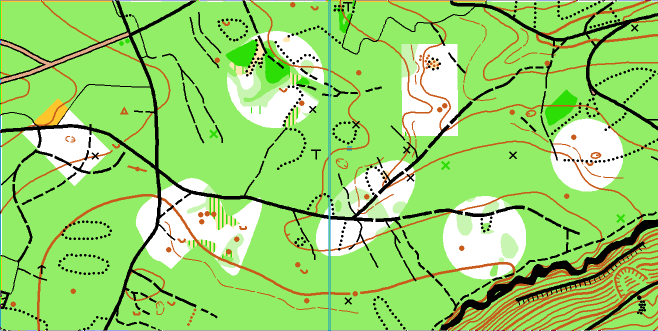
- Draw an area object over your map and Cut Holes in it. In this example, we use a green area symbol.
- We select the green area symbol and use the Crop function to crop everything except the holes.
- Save the map, load it as Background Map in your [Course Setting File] and set courses.
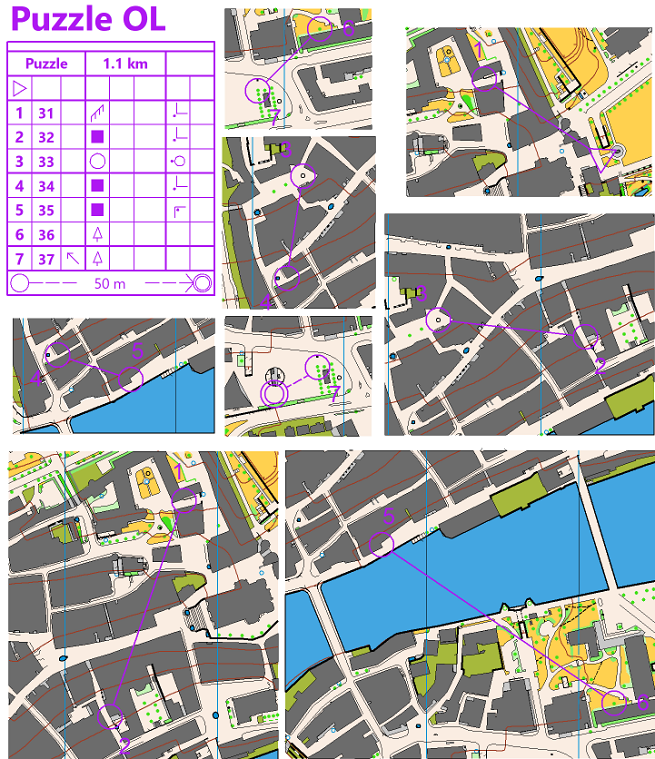
Puzzle O
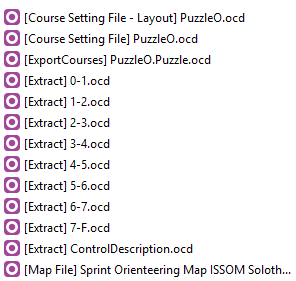
- Open a new [Course Setting File], load your [Map File] as a Background Map and set a course.
- Export your course as a Course Map under Course Setting>Export>Export Course Maps.
- Reopen your Course Map. Go to File>Open Recently Exported Documents.
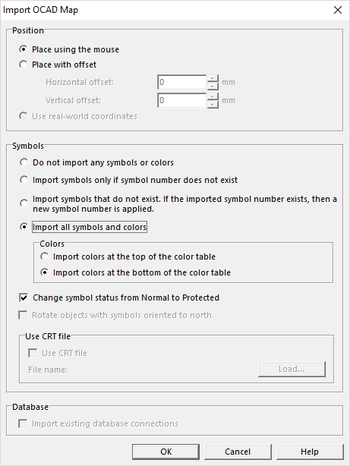
- In a first step remove the Background Map (Background Map>Manage>Remove) and in a second step import the Background Map (File>Import). Import all symbols and colors and Import colors at the bottom of the color table.
- Export a Map Extract for each control (Map>Export Part of Map).
- Open a new [Course Setting File] for the final Layout.
- Import all Map Extracts one by one in the new [Course Setting File] and place them using the mouse (File>Import). Again, import all symbols and colors and Import colors at the bottom of the color table.
- Edit each Map Extract manually in the new [Course Setting File].
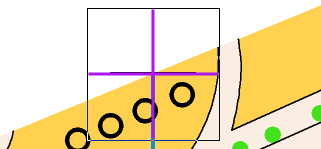
![]() The imported symbols are protected by default, so it's not possible to move them after the first placement. Select the symbols in the symbol box and set their status to Normal (F2) to move them around.
The imported symbols are protected by default, so it's not possible to move them after the first placement. Select the symbols in the symbol box and set their status to Normal (F2) to move them around.
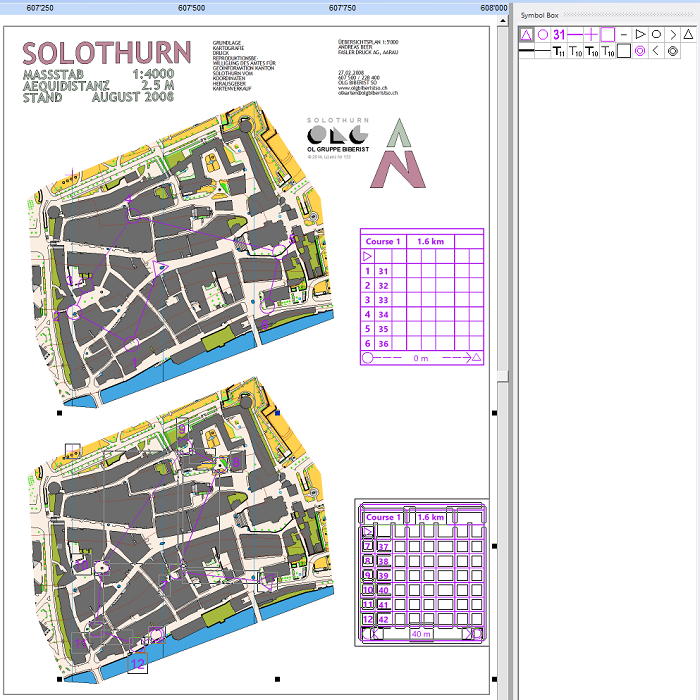
![]() A map flip at every control increases the difficulty. Arrange the Map Extracts in the Layout [Course Setting File] in a way, that you can print the odd numbers on the front and the even numbers on the back side of a map.
A map flip at every control increases the difficulty. Arrange the Map Extracts in the Layout [Course Setting File] in a way, that you can print the odd numbers on the front and the even numbers on the back side of a map.
Map Change
Let's assume we add only one Map Exchange.
Print Course on two Maps
- Open a new [Course Setting File], load your [Map File] as a Background Map and set a course.
- Insert a Map Change into your course. A map exchange can be placed after a control (which is indicated with 0m to the next start in the control description) or after a Marked Route (the length of the marked route appears in the control description). Add a Start symbol after the map exchange.
- When you print or export your map, two maps will be printed/ exported. The start on the second map is indicated with a Start symbol.
Print Course on one Map
- Modify your [Map File] first. Crop the part you will use for your course and Duplicate it. Insert a Registration Mark (Symbol 602 in ISOM 2017) into your map before you duplicate it.
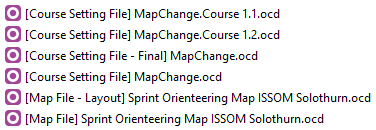
- Save the modified [Map File] under a new name, e.g. [Map File - Layout].
- Open a new [Course Setting File], load your [Map File - Layout] as a Background Map.
- Set a course with a Map Change. Only use one map extract for course setting. Put a Registration Mark (Symbol 750 in ISCD 2018) at the same place as the Registartion Mark of your [Map File - Layout].
- Export Course Maps under Course Setting>Export>Export Course Maps.
- Open both course maps. Copy the course objects from one file and insert them into the other. Use the Registration Marks for adjustment.
- Modify your course where needed and save your [Course Setting File] under a new name, e.g. [Course Setting File -Final].
![]() As a different workaround, you could proceed like in the Puzzle-O above. You don't modify your [Map File], but import it into both Course Maps, where you export Map Extracts for the [Course Setting File -Final].
As a different workaround, you could proceed like in the Puzzle-O above. You don't modify your [Map File], but import it into both Course Maps, where you export Map Extracts for the [Course Setting File -Final].
Map Change with Scale Change
If you like to insert a map change with a scale change (e.g. first part of your course is on a 1:10'000 Forest Map, second part is on a 1:4'000 Sprint Map), then you can follow the Map Insert example below.
Instead of copy the course objects from the second course file into the first course file, you would need to open a different background map in the second course file.
Map Insert
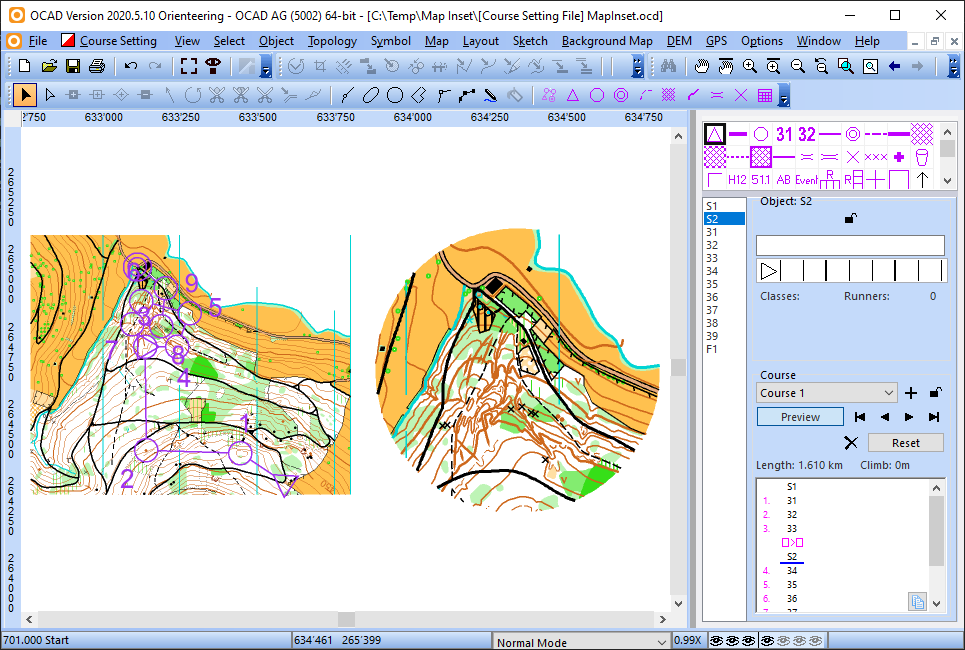
Let's assume you set a normal course, but the end of the course should be on a enlarged map insert.
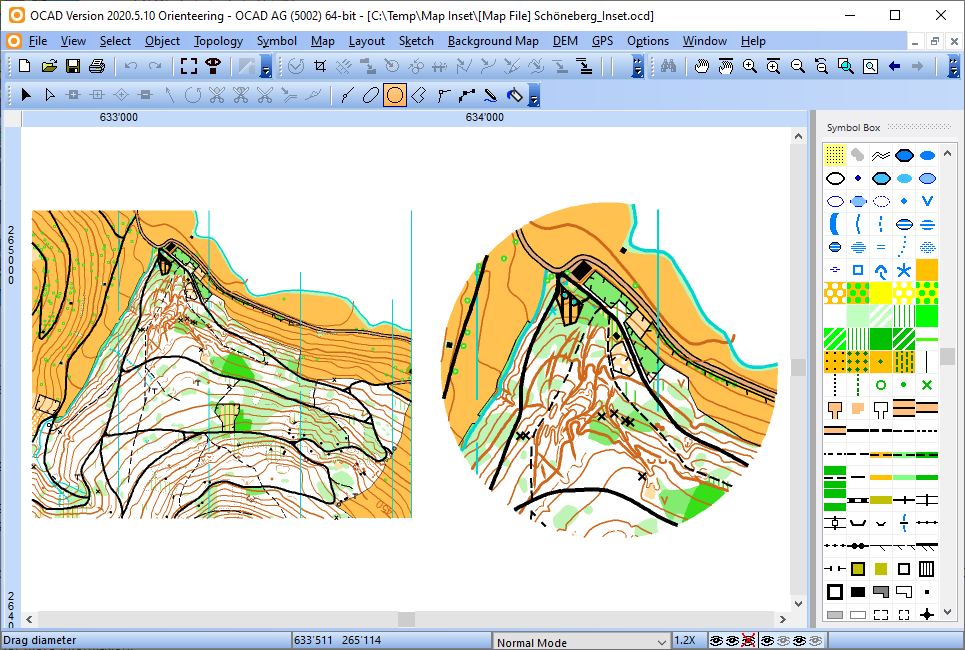
In this example, we like to enlarge a part of the [Map File] . The [Map File] has scale 1:10'000 and the enlargement shall have scale 1:5'000.
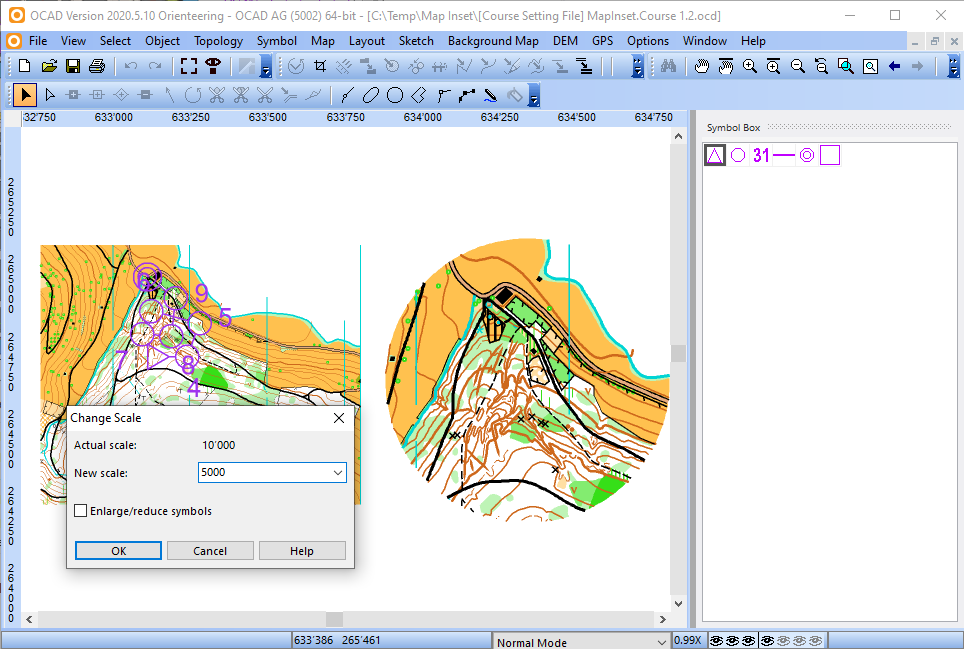
- Duplicate the [Map File]. In the duplicated file, crop the part you like to enlarge and change the scale to 1:5'000. Check Enlarge/reduce symbols.
- Copy the enlarged map extract to your original [Map File] and save this file unser a new name.
- Now open a new [Course Setting File] and open the adjusted [Map File] as Backround Map.
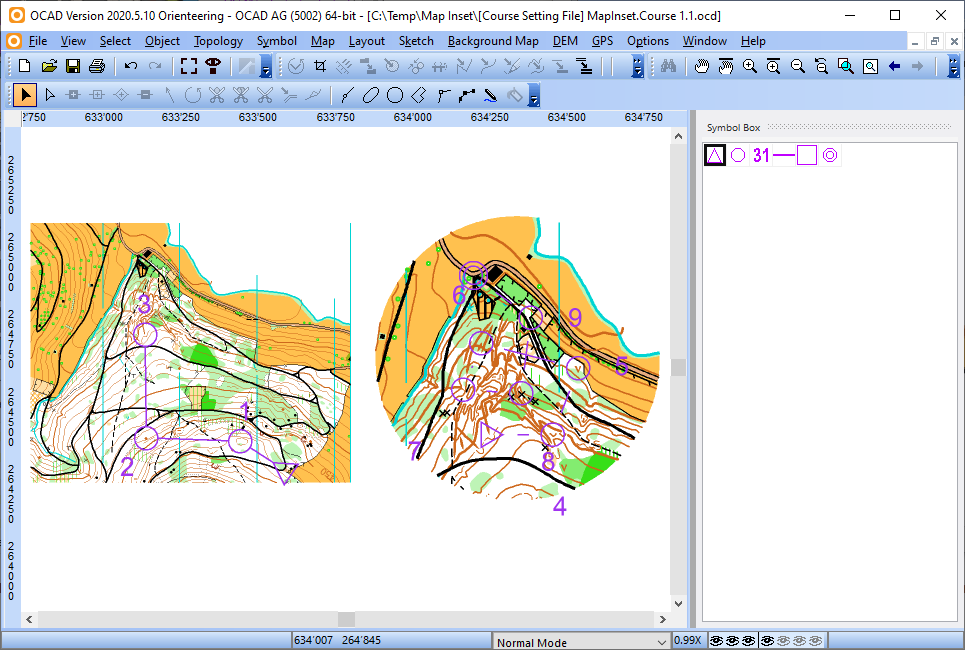
- Set a course with a Map Change. Only use one map extract for course setting.
- Export Course Maps under Course Setting>Export>Export Course Maps. Two course maps will be exported.
- Open the second course map. Again, change the scale to 1:5'000. This time, do not check Enlarge/reduce symbols.
- Copy the course objects from the second course file into the first course file.
- Make grafic modifications and print the map.
Score O
See the Score Orienteering page for more information.

Orienteering Without Controls
Sometimes you want to offer orienteering trainings which can be done individually and over a longer period of time.
In this section you find apps, which make orienteering courses available year round with no need for flags to mark the control points. Instead, the apps track your location via GPS from your smartphone and make a sound when you have found the control points.
To set up a new event, both apps require a map file and a course setting file. These can be easily created and exported with OCAD. Due to the use of GPS, it is important that the files are georeferenced correctly.
For a new map we recommend to start it with the New Map Wizard. In addition to the correct georeferencing, geodata can be imported directly. But also old maps can be georeferenced afterwards.
The georeferenced map file can then be loaded as background map in the course setting project. Now the courses can be set.
For more information about the apps, please visit their websites.
MapRun
MapRunF is being developed by a keen orienteer in Brisbane, Australia.
There are differnt apps of MapRun. MapRun6 is the newest version of MapRun. MapRunG runs on a Garmin Watch and works in conjunction with MapRun6.
To upload maps and courses to MapRunF, you need to export…
- The course setting project itself as KMZ via menu File > Export > KMZ Google Earth (raster). Export 512x512px tiles.
- The courses as KML via menu Course Setting > Export > Courses (KML). Export a separate KML for each course. Open the KML file with a text editor and check that the start is named S1 and the finish F1. Otherwise, rename it.
UsynligO
UsynligO is being developed by Trond Benum from Norway.
The app tracks your location via GPS and vibrates and makes a sound when you have found the next control point.
To upload maps and courses to UsynligO, you need to export…
- The course setting project itself as PDF via menu File > Export > PDF
- Courses as IOF 3.0 XML via menu Course Setting > Export > Courses (XML,IOF Version 3.0)
Navi Tabi brings the enjoyment of navigation to people all over the world.
NaviTabi uses KMZ file, which can be exported from OCAD. After creating KMZ file from OCAD, the file can be imported into NaviTabi to replace the default map. Import can be done using the smartphone app or by using the import tool on the webpage.
The following [Facebook page] shows a video of using the smartphone app to import a KMZ file.
The webpage import can be done by uploading KMZ file onto your personal page.
The file size limit for the KMZ file is 5MB.
NaviTabi, in addition to just importing the KMZ file for the base map, can also import course files in the IOF XML 3.0 format. It can read only Point-O and will not be able to import a score O course nor butterfly loops.
O-RANGE
O-RANGE is a Garmin watch app for orienteering runners. The watch alerts you when you hit the control during a race or training.
O-range is free of charge and works only on Garmin watches at the moment. it is used by about 900 users all over the world
O-range reads gpx-files and IOF-xml version 3.0" from Ocad. The map must be georeferenced. You can georeference your files in o-range, but it is a bit tricky. You can also import routes directly from Livelox and O-track.
Vikazimut
Vikazimut is an Android application that allows you to perform orienteering races in autonomy.
GPS Orienteering
GPS Orienteering is the app for all of you enjoying orienteering. The main purpose of the app is that you shall be able practice orienteering in an efficient way without having to set out control points. This is done by using the integrated GPS in the smartphone to decide if you have reached a control point. You draw the course the course in the smartphone, run the course and evaluate the race using this smartphone app!
iOrienteering
iOrienteering allows you to find events and time yourself with your phone. It is simple to create your own courses.


