Course Setting Options: Difference between revisions
(Created page with "''(This function is only available in course setting projects!)'' This dialog box appears when clicking '''Options''' in the '''Course''' menu. In this dialog box you define o...") |
|||
| (15 intermediate revisions by 5 users not shown) | |||
| Line 1: | Line 1: | ||
[[Category: Course Setting]][[File:Pro40px.PNG|This function is available in OCAD Professional.|link=https://www.ocad.com/en/products/ocad-for-cartography]][[File:Std40px.PNG|This function is available in OCAD Orienteering.|link=https://www.ocad.com/en/products/ocad-for-orienteering]][[File:Sta40px.PNG|This function is available in OCAD Starter.|link=https://www.ocad.com/en/products/ocad-for-orienteering]][[File:CS40px.PNG|This function is available in OCAD Course Setting.|link=https://www.ocad.com/en/products/ocad-for-orienteering]] | |||
''(This function is only available in course setting projects!)'' | ''(This function is only available in course setting projects!)'' | ||
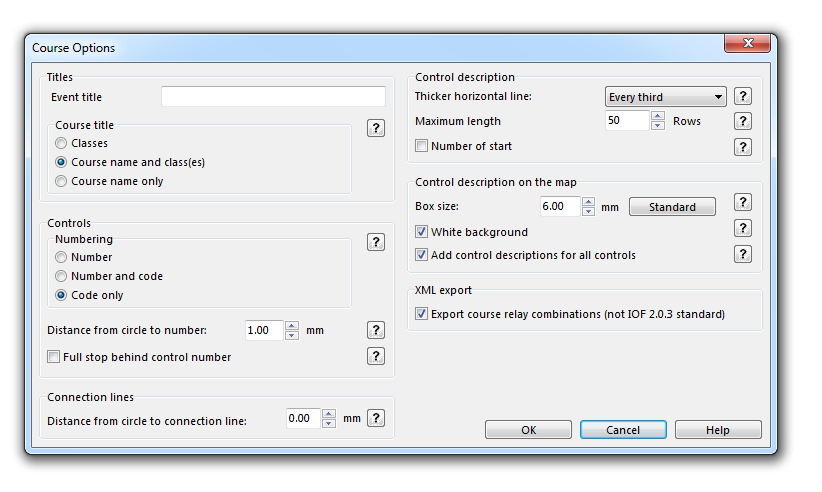
Choose the '''Options''' command from the '''Course Setting''' menu to display the '''Course Options''' dialog box. | |||
[[File:CourseOptions.PNG]] | |||
===Titles=== | |||
====Event Title==== | |||
Enter the name of the event. The event title appears on top of the control description.<br /> | |||
====Course Title==== | |||
Choose wheter the '''[[Add_Course_Setting_Objects#Add_a_Course_Title|Course Title]]''' shall be displayed with the '''[[Create a New Class|Classes]]''', the '''[[Create a New Course|Course Name]] and [[Create a New Class|Classes]]''' or the '''[[Create a New Course|Course Name]] only'''. | |||
[[File:CourseTitleHelp.PNG]] | |||
===Controls=== | |||
====Numbering==== | |||
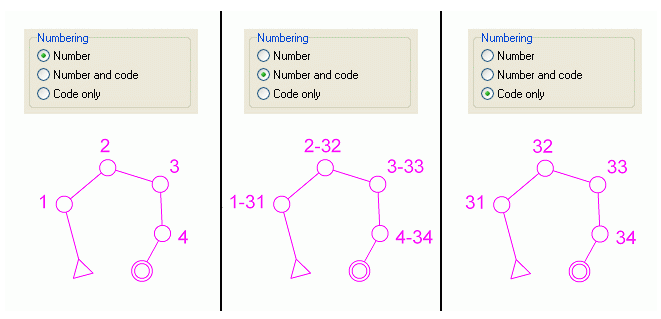
Choose wheter the controls shall be numbered with the '''Number''', the '''Number and Code''' or the '''Code only'''. | |||
[[File:NumberingHelp.PNG]] | |||
====Distance from Circle to Number==== | |||
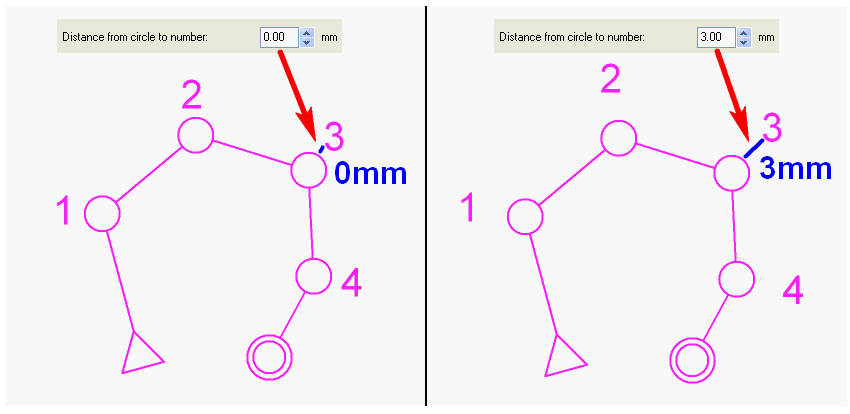
Enter the default distance from the control circle to the number in mm. | |||
[[File:DistanceFromCircleToNumberHelp.PNG]] | |||
====Full Stop Behind Control Number==== | |||
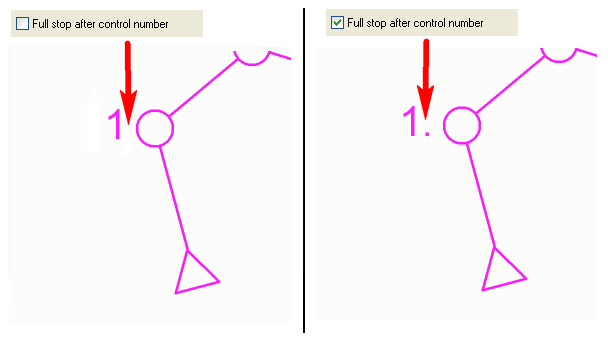
Check this option if a full stop shall be placed behind each control number. | |||
[[File:FullStopHelp.PNG]] | |||
==== White Outline on Control Number==== | |||
This function is only available for ISSOM 2007 and ISOM 2017 course setting projects. | |||
ToDo. | |||
===Connection Lines=== | |||
Define a distance from the circle to the connection line in this field. | |||
[[File:DistanceFromCircleHelp.PNG]] | |||
===Control Description=== | |||
====Thicker Horizontal Line==== | |||
Choose between a thicker horizontal line in the '''[[Edit_Course_Setting_Objects#IOF_Symbol_Control_Description|IOF Symbol Control Description]]''' every third or every fourth line or not at all. | |||
[[File:ThickerHorizontalLineHelp.PNG]] | |||
====Maximum Length==== | |||
Define the maximum length of the control description in rows in this field. | |||
[[File:MaximumLengthHelp.PNG]] | |||
====Number of Start==== | |||
Check this option so that the number of the start appears in the control description. | |||
[[File:NumberOfStartHelp.PNG]] | |||
===Control Description on the Map=== | |||
====Box Size==== | |||
Define the size of a box in the control description in this field. Click the '''Standard''' button to set the value to '''6.00 mm'''. | |||
[[File:BoxSizeHelp.PNG]] | |||
[[File:Hint.jpg|Hint]] [http://orienteering.org/wp-content/uploads/2010/12/IOF-Control-Descriptions-20041.pdf IOF International Specification for Control Description 2004]: The description sheet boxes should be between 5mm and 7mm. | |||
====White Background==== | |||
Check this option to get a white background behind the control description on the map. | |||
[[File:WhiteBackgroundHelp.PNG]] | |||
''' | Check the '''Draw white background even in draft mode''' option to show the control description with white background also in draft mode. Use this option if you prefer to print your maps in draft mode. | ||
Activate the option, switch to draft mode and move both draft mode sliders in the View toolbar to the right position. [[File:DraftModeSliders.png]] | |||
[[File:ControlDescriptionBlockout.png]] | |||
''' | Select a course and click the '''Preview''' button. The course overprint now is transparent, but the white background of the control description is opaque and blocks out the orienteering map. | ||
''' | OCAD does not block out only the control description. Furthermore, OCAD blocks out all objects drawn with this opaque color used in the symbol '''760.00 White background'''. By default it is the color number '''203 White background.''' | ||
''' | '''Example''': If you also like a framing of the control numbers in draft mode, select the symbol '''703.000 Course: Control number''', edit the symbol and change the color from '''204 Purple transparent''' to '''202 Purple'''. Click on the Framing tab, enter the new '''Line width''' (0.2mm) and change the '''Framing color''' to the opaque color '''203 White background.''' | ||
Close this dialog. The control numbers have now a white framing. | |||
[[File:ControlNumberFraming.png|600px]] | |||
''' | ====Add Control Descriptions for All Controls==== | ||
Check this option to add the control description on the '''All Controls''' map, too. | |||
[[File:AddControlDescriptionHelp.PNG]] | |||
===XML Export=== | |||
Activate this check box to export the relay variation within the XML export, too. This is an extension of the IOF specification. | |||
Back to [[Course Setting for Orienteering]] | ---- | ||
Back to the '''[[Course Setting for Orienteering]]''' page. | |||
Latest revision as of 17:35, 10 April 2017
(This function is only available in course setting projects!)
Choose the Options command from the Course Setting menu to display the Course Options dialog box.
Titles
Event Title
Enter the name of the event. The event title appears on top of the control description.
Course Title
Choose wheter the Course Title shall be displayed with the Classes, the Course Name and Classes or the Course Name only.
Controls
Numbering
Choose wheter the controls shall be numbered with the Number, the Number and Code or the Code only.
Distance from Circle to Number
Enter the default distance from the control circle to the number in mm.
Full Stop Behind Control Number
Check this option if a full stop shall be placed behind each control number.
White Outline on Control Number
This function is only available for ISSOM 2007 and ISOM 2017 course setting projects. ToDo.
Connection Lines
Define a distance from the circle to the connection line in this field.
Control Description
Thicker Horizontal Line
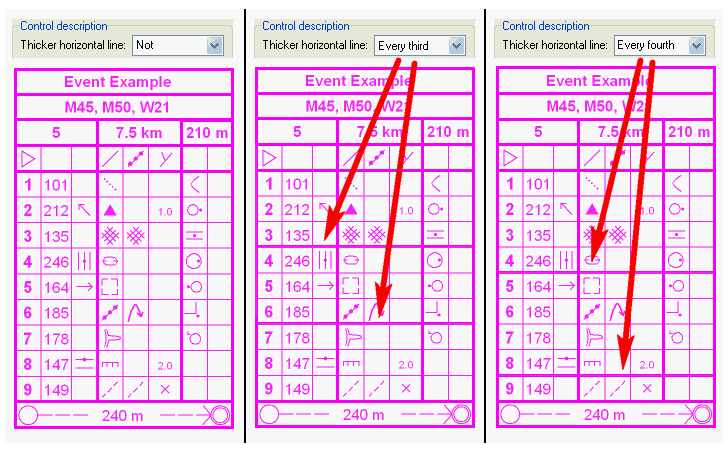
Choose between a thicker horizontal line in the IOF Symbol Control Description every third or every fourth line or not at all.
Maximum Length
Define the maximum length of the control description in rows in this field.
Number of Start
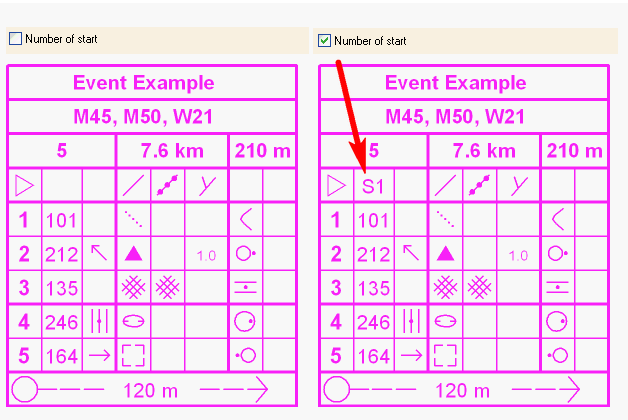
Check this option so that the number of the start appears in the control description.
Control Description on the Map
Box Size
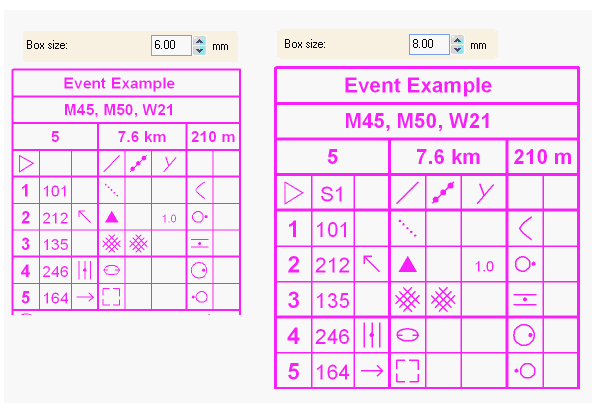
Define the size of a box in the control description in this field. Click the Standard button to set the value to 6.00 mm.
![]() IOF International Specification for Control Description 2004: The description sheet boxes should be between 5mm and 7mm.
IOF International Specification for Control Description 2004: The description sheet boxes should be between 5mm and 7mm.
White Background
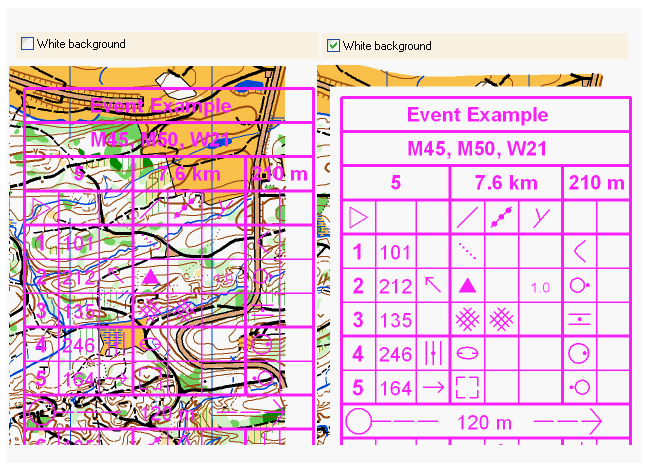
Check this option to get a white background behind the control description on the map.
Check the Draw white background even in draft mode option to show the control description with white background also in draft mode. Use this option if you prefer to print your maps in draft mode.
Activate the option, switch to draft mode and move both draft mode sliders in the View toolbar to the right position. 
Select a course and click the Preview button. The course overprint now is transparent, but the white background of the control description is opaque and blocks out the orienteering map.
OCAD does not block out only the control description. Furthermore, OCAD blocks out all objects drawn with this opaque color used in the symbol 760.00 White background. By default it is the color number 203 White background.
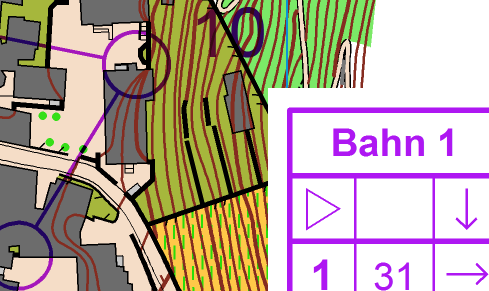
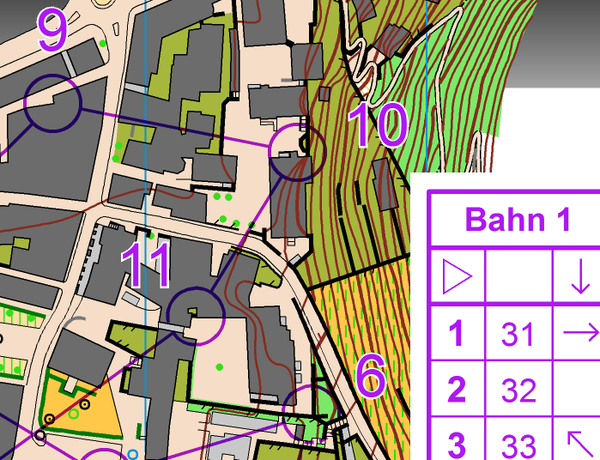
Example: If you also like a framing of the control numbers in draft mode, select the symbol 703.000 Course: Control number, edit the symbol and change the color from 204 Purple transparent to 202 Purple. Click on the Framing tab, enter the new Line width (0.2mm) and change the Framing color to the opaque color 203 White background.
Close this dialog. The control numbers have now a white framing.
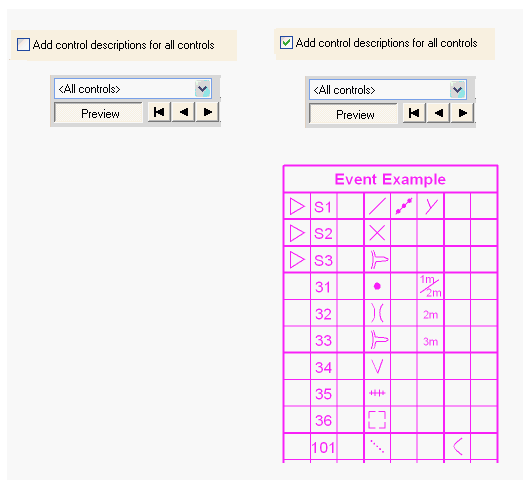
Add Control Descriptions for All Controls
Check this option to add the control description on the All Controls map, too.
XML Export
Activate this check box to export the relay variation within the XML export, too. This is an extension of the IOF specification.
Back to the Course Setting for Orienteering page.
