Start with a School Orienteering Map: Difference between revisions
No edit summary |
No edit summary |
||
| (2 intermediate revisions by the same user not shown) | |||
| Line 1: | Line 1: | ||
The focus of this tutorial is how to start a School Orieteering Map in OCAD. | The focus of this tutorial is how to start a School Orieteering Map in OCAD. | ||
You need at least the OCAD Starter – Edition to follow this tutorial. Of yourse, you can also use a higher OCAD edition (Orienteering, Mapping Solution). | |||
==Start a new project== | ==Start a new project== | ||
| Line 13: | Line 13: | ||
[[File:SchoolMap02.png|500px]] | [[File:SchoolMap02.png|500px]] | ||
If you like to create a school map in one of the countries listed on the left, you have even better data available than OSM. Find more information [[New_Map_Wizard|here]]. | |||
| Line 18: | Line 20: | ||
Choose the ''Symbol Set for School Orienteering Maps 2019.ocd''. This is a predefined symbol set, released in 2019 by the International Orienteering Federation. | Choose the ''Symbol Set for School Orienteering Maps 2019.ocd''. This is a predefined symbol set, released in 2019 by the International Orienteering Federation. | ||
Optional: Choose a different Map Scale. | Optional: Choose a different Map Scale. A scale of 1:1000 means that 1cm on the map correspons to 1000cm (or 10m) in the terrain. | ||
Optional: Choose where and under which file name you like to save your project. | Optional: Choose where and under which file name you like to save your project. | ||
Use the CRT file ''OSM to ISSprOM 2019. | Use the CRT file ''OSM to ISSprOM 2019.ocdCrt''. This file will convert the imported OSM data directly into OCAD symbols. | ||
[[File:SchoolMap03.png|500px]] | [[File:SchoolMap03.png|500px]] | ||
===Geo reference=== | ===Geo reference=== | ||
Navigate to the location from your map in the window. The extend you see in the window will be downloaded. If the extend is large, the download will take more time. | Navigate to the location from your map in the window. The extend you see in the window will be downloaded. If the extend is large, the download will take more time. | ||
OCAD show the correct UTM coordiantes system for the map location (e.g. UTM/WGS 84 Zone 32 North). Click the Change button to change to another [[Create_a_New_Map#Coordinate_System|Coordinate System]]. | |||
Rotate the map to Magnetic North to consider the declination. This is recommended as your compass is pointing to Magnetic North and not to Geographic North. | |||
[[File:SchoolMap04.png|500px]] | [[File:SchoolMap04.png|500px]] | ||
| Line 86: | Line 87: | ||
[[File:Hint.jpg]] You can't export a PDF, when you are in the '''[[View_Mode|Draft View]]''' mode. Change to the Normal mode. | [[File:Hint.jpg]] You can't export a PDF, when you are in the '''[[View_Mode|Draft View]]''' mode. Change to the Normal mode. | ||
==Further information== | |||
For more information, please see the tutorial '''[[Drawing_Orienteering_Maps_in_OCAD#Mapping_in_the_terrain|Drawing Orienteering Maps in OCAD]]'''. | |||
Latest revision as of 11:28, 1 February 2021
The focus of this tutorial is how to start a School Orieteering Map in OCAD.
You need at least the OCAD Starter – Edition to follow this tutorial. Of yourse, you can also use a higher OCAD edition (Orienteering, Mapping Solution).
Start a new project
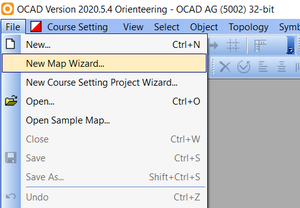
Open the New Map Wizard
Data Source and Map type
Import Open Street Map (OSM) data. OSM data is available worldwide. The quality and quantity of the data depends on which region you are.
If you like to create a school map in one of the countries listed on the left, you have even better data available than OSM. Find more information here.
Symbol Set
Choose the Symbol Set for School Orienteering Maps 2019.ocd. This is a predefined symbol set, released in 2019 by the International Orienteering Federation.
Optional: Choose a different Map Scale. A scale of 1:1000 means that 1cm on the map correspons to 1000cm (or 10m) in the terrain.
Optional: Choose where and under which file name you like to save your project.
Use the CRT file OSM to ISSprOM 2019.ocdCrt. This file will convert the imported OSM data directly into OCAD symbols.
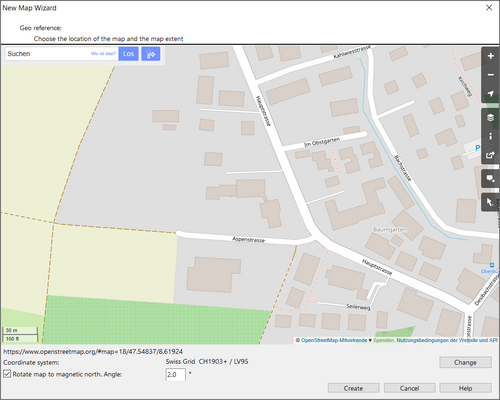
Geo reference
Navigate to the location from your map in the window. The extend you see in the window will be downloaded. If the extend is large, the download will take more time.
OCAD show the correct UTM coordiantes system for the map location (e.g. UTM/WGS 84 Zone 32 North). Click the Change button to change to another Coordinate System.
Rotate the map to Magnetic North to consider the declination. This is recommended as your compass is pointing to Magnetic North and not to Geographic North.
OSM data in OCAD
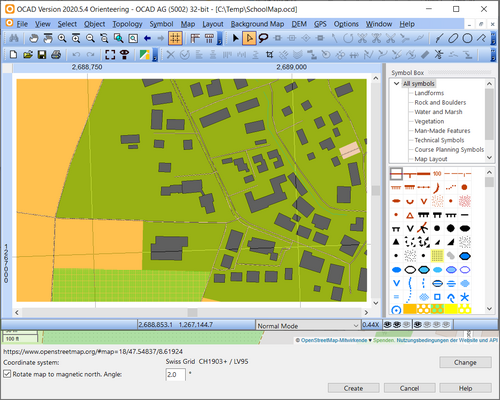
OCAD will download and crop your map. The OSM data is directly converted to OCAD symbols.
Good job! You have now a georeferenced base map of your school map in the right scale with the right symbol set.
Add Background Maps
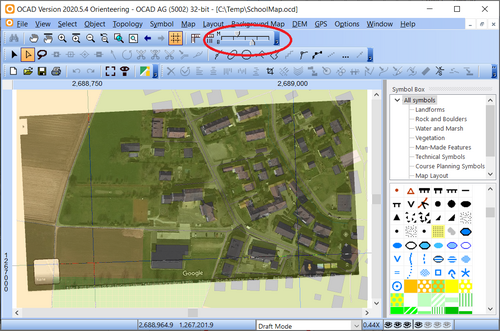
Now let's add a aerial image. Go to Menu Background Map > Online Map Services.
Choose Google Maps as Service. The map extend in your OCAD window will be shown as Google Map image. If you change the extend in the OCAD map window, click on Update. Now click on Load as background map. The Goole Map image will be directly loaded as georeferenced image in OCAD.
In the View menu, you can choose the Draft Mode. A slider will appear, where you can set the transparency of the map and the background map.
Additional background maps can be added via menu Background Map > Open.
If you are back from mapping in the terrain, you can scan your notes and open them as backround map in OCAD.
Important: You need to adjust your mapping notes, as the scanned image is not geo-referenced.
Draw an Object on the Map
To draw an object, click on the symbol in the symbol box first, then choose the drawing tool in the toolbar and finally draw the object in the drawing area.
Please read the Wiki Page Drawing an Object to learn more about it.
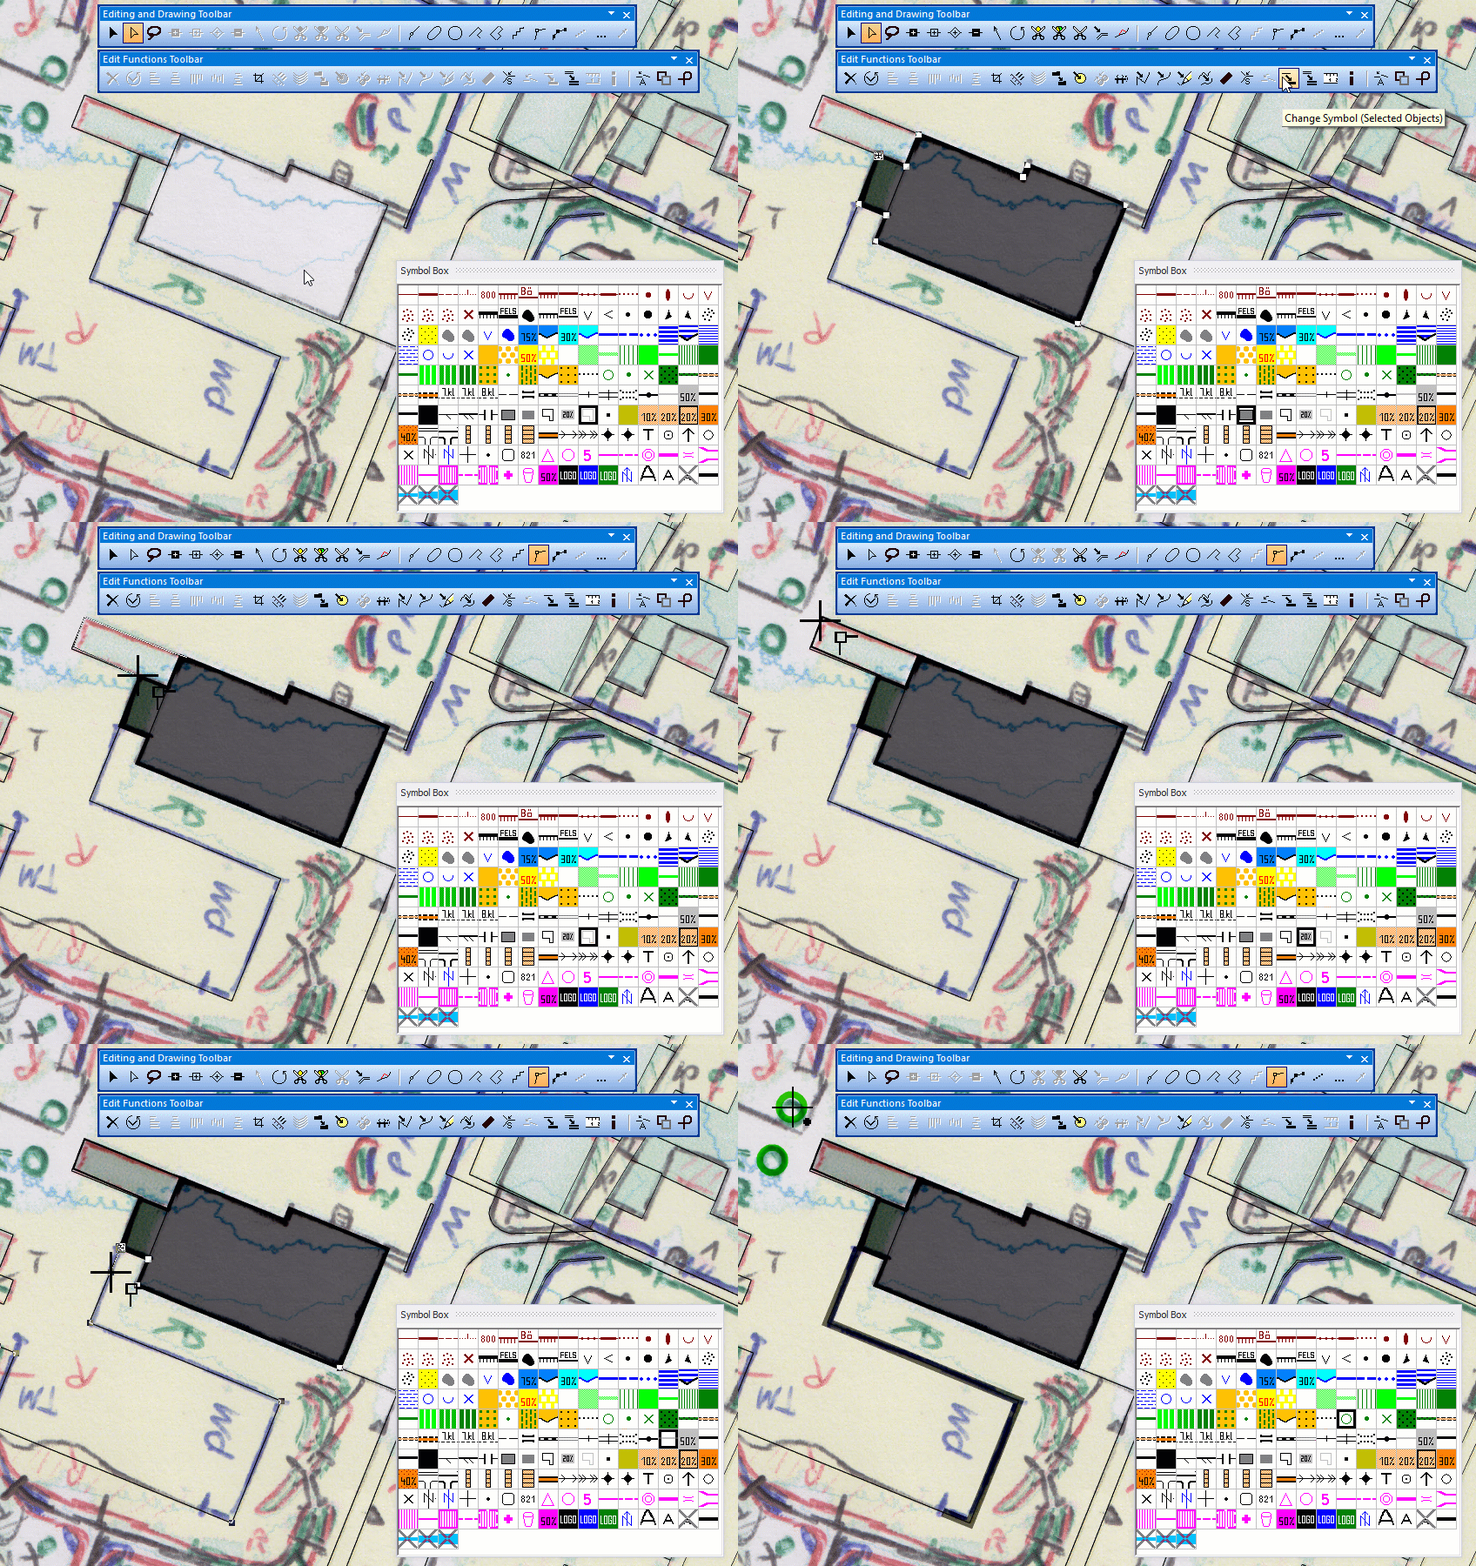
Edit Objects
To edit an object, there are many tools
Find more information on the Edit Object page.
Print and Export
Go to File>Print (or Ctrl+P) to print your map. Select printer, scale and extend. Read more on the Printing Maps page.
Export Files
Go to File>Export (or Ctrl+E) to export your map. Set output file, quality and extend. Read more on the Export Files page.
![]() You can't export a PDF, when you are in the Draft View mode. Change to the Normal mode.
You can't export a PDF, when you are in the Draft View mode. Change to the Normal mode.
Further information
For more information, please see the tutorial Drawing Orienteering Maps in OCAD.
