O-training with OCAD
Learn how to make o-technical excercises.
Preparation
For a Course Setting Project, you need two OCAD files:
- A [Course Setting File]
This is the file where manage your Course Setting Project, set courses and load a Background Map.
Like map files it has the extension .ocd, but it has a special internal mark to identify it as a course setting file.
- A [Map File]
This is your OCAD map which will be loaded as Background map in your [Course Setting File].
![]() You can also load a raster image (PNG, JPG, ...) as Background Map. However, for the trainings described below, you need to modify your Background Map, so you need a OCAD file.
You can also load a raster image (PNG, JPG, ...) as Background Map. However, for the trainings described below, you need to modify your Background Map, so you need a OCAD file.
Now start a New Coure Setting Project. Make sure the map scale of your [Course Setting File] is the same as your [Map File].
Correct Scale
It sometimes happens, that your course setting project and your background map have different scales without noticing it.
Generally, OCAD checks if the Background Map comes in the same scale as the course setting project and in case the scales are different, there will be an Error Message.

Check the scale of your course setting project under Map>Set Scale and Coodinate System.
Check the scale of your background map under Background Map>Manage. Click on the Information Icon behind the Backgound Map.
To be really sure that the scale is correct:
- Messure a line in OCAD and Google Maps and compare them.
- If your background map is georeferenced, you can export your courses in KMZ format and open them in Google Earth (File>Open Recently Exported Documents). There you see if your map corresponds with the terrain.
10'000 and 15'000
In the ISOM 2017, the 1:10'000 map is defined as a 150% magnification of the 1:15'000 map. This applies to all objects including course setting objects (e.g. control circles are 7.5mm for 10'000 and 5mm for 15'000; in the past all control circles were 6mm).
Let's assume our Background Map has the scale 1:10'000:
- When both 1:10'000 and 1:15'000 maps need to be printed, the entire course setting shall be done in a 1:10'000 project and only the print and/or export scale needs to be adjusted.
- The exact size of the Control Description is not defined according to ISCD 2018. It must be between 5-7mm. If a Control Description is printed on the map, it is recommended to change the size of the Control Description (Course setting>Options) before exporting 1:15'000 maps, e.g. to 7.5mm, which results in 5mm. Otherwise, the Control Description is only 4mm on the 1:15'000 print, as it is set to 6mm for 1:10'000 by default.
- If the scale appears on the map (in our assumption 1:10'000), it should of course be changed before exporting 15'000 maps in the [Map File].
![]() Important: Only change the font and not the scale itself in the [Map File]. Save the [Map File] still in 1:10'000 under a new name and reload it as background map in the [Course Setting File]. Alternatively, simply specify the scale in the [Course Setting File] with a font.
Important: Only change the font and not the scale itself in the [Map File]. Save the [Map File] still in 1:10'000 under a new name and reload it as background map in the [Course Setting File]. Alternatively, simply specify the scale in the [Course Setting File] with a font.
O-trainings
Simple Course
See this Video about Course Setting Basics. More is coming soon...
Corridor
- Open a new [Course Setting File] and load your [Map File] as a Background Map.
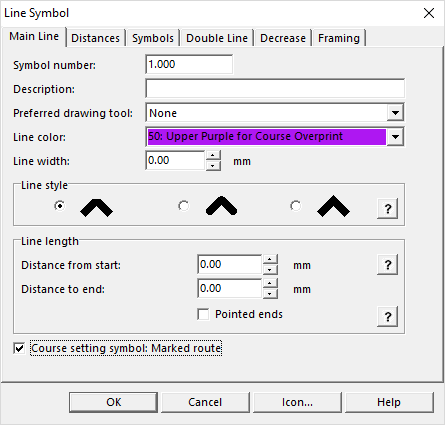
- Choose New in the Symbol Menu and create a new Line Symbol.
- - In the Mail Line tab, activate Course setting symbol: Marked route.
- - In the Double Line tab, choose the desired width of the corridor (e.g. 4mm) and the border lines.
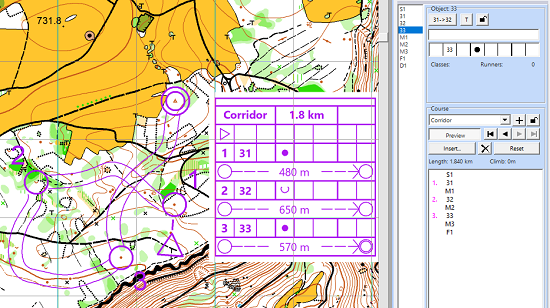
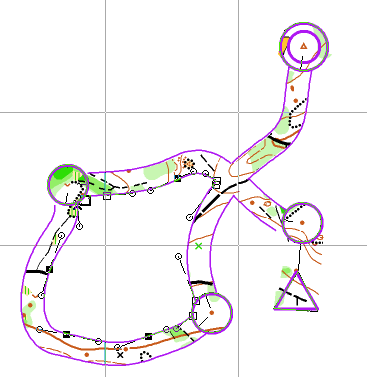
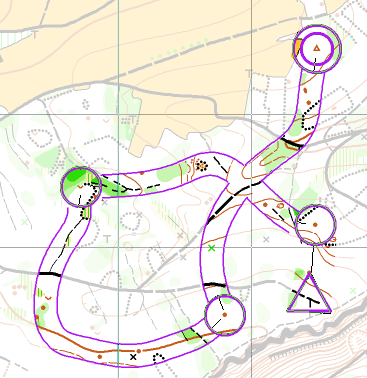
- Draw your corridor. Each corridor will appear as a Mared Route in the Course Setting Box. Insert the corridors in your course.
- Edit your corridor in a next step.
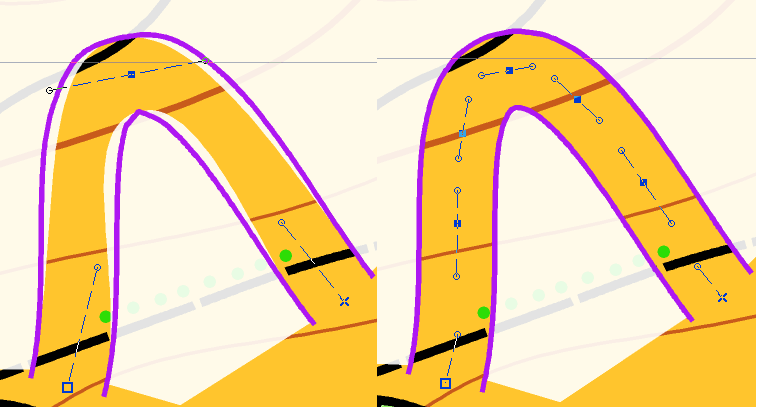
- - Cut overlapping parts.
- - Insert additional vertices in sharp turns.
- Cover the remaining parts with white
- - Use the White background (Symbol 760) and the Follow existing objects
- - Activate Follow existing objects under Options> OCAD Preferences> Drawin and Editing to enable line following for double lines (hold the Ctrl button).
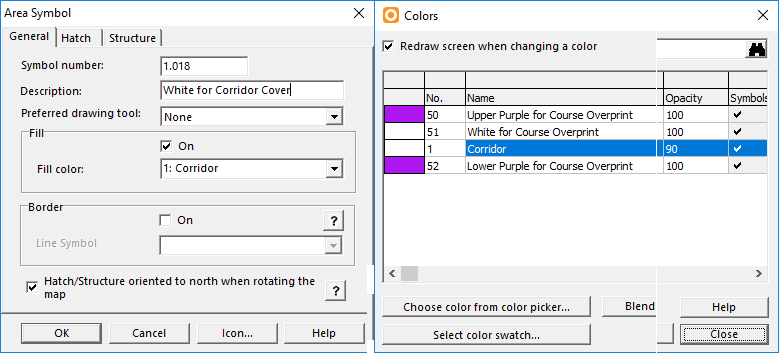
- - Instead of using White background for covering, first define a new white color (Map>Colors>Add) and then create a new area symbol (Symbol>New>Area Symbol) where you use this color as Fill Color. Like this you can set the Opacity of the white color to e.g. 90%, so you are not completly lost when leaving the corridor.
Reduce Map
- Open your [Map File].
- Select the symbols you want to hide in the Symbol Box and go to Symbol>Hide Object or simply press F4.
- Save the map, load it as Background Map in your [Course Setting File] and set courses.
Multitechnique
- Open your [Map File].
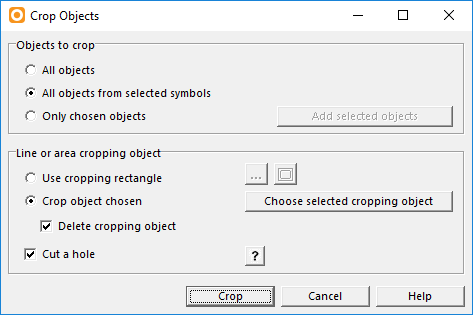
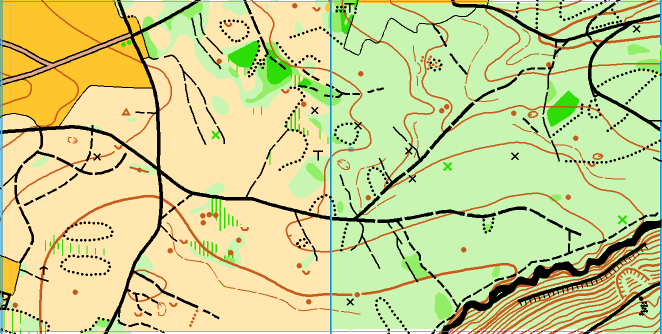
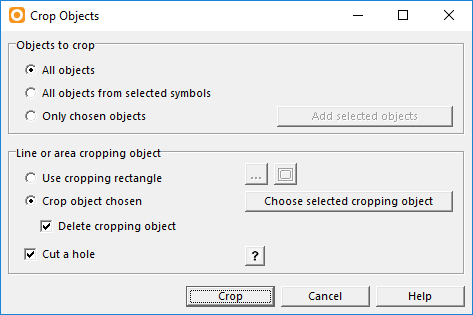
- Use the Crop funtion to differ which symbols you want to crop in which parts of your map.
In the following example, we used the yellow and green areas as Crop Objects. In the yellow part, all paths and roads were cropped. In the green area, all terrain objects. You can use the Crop funktion as often as you like in the same [Map File].
- Save the map, load it as Background Map in your [Course Setting File] and set courses.
Island O
- Open your [Map File].
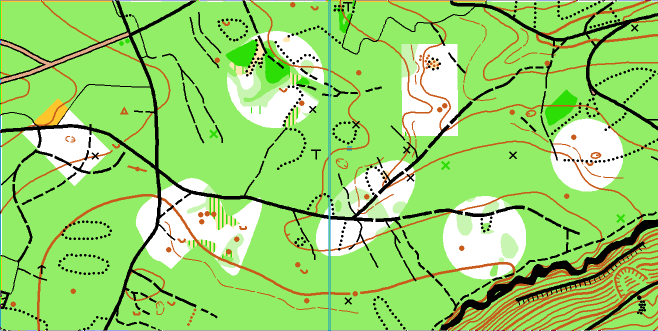
- Draw an area object over your map and Cut Holes in it.
- Use the Crop function to crop everything except the holes.
- Save the map, load it as Background Map in your [Course Setting File] and set courses.
Puzzle O
- Open a new [Course Setting File], load your [Map File] as a Background Map and set a course.
- Export your course asCourse Map under Course Setting>Export>Export Course Maps.
- Reopen your Course Map. Go to File>Open Recently Exported Documents.
- In a first step remove the Background Map (Background Map>Manage>Remove) and in a second step import the Background Map (File>Import). Import all symbols and colors and Import colors at the bottom of the color table.
- Export a Map Extract for each control (Map>Export Part of Map).
- Open a new [Course Setting File] for the final Layout.
- Import all Map Extracts one by one and place them using the mouse. Again, import all symbols and colors and Import colors at the bottom of the color table
![]() The imported symbols are protected by default, so it's not possible to move them after the first placement. Select the symbols in the symbol box and set their status to Normal (F2) to move them around.
The imported symbols are protected by default, so it's not possible to move them after the first placement. Select the symbols in the symbol box and set their status to Normal (F2) to move them around.
- Edit each Map Extract manually.
