O-training with OCAD: Difference between revisions
Jump to navigation
Jump to search
No edit summary |
|||
| Line 19: | Line 19: | ||
== Corridor == | == Corridor == | ||
* Choose '''New''' in the '''Symbol''' Menu and create a new '''Line Symbol'''. | * '''''Course Setting''''' Choose '''New''' in the '''Symbol''' Menu and create a new '''Line Symbol'''. | ||
:- In the '''Mail Line''' tab, activate '''Course setting symbol: Marked route''' | :- In the '''Mail Line''' tab, activate '''Course setting symbol: Marked route''' | ||
:- In the '''Double Line''' tab, choose the desired width of the corridor (e.g. 4mm) and the border lines. | :- In the '''Double Line''' tab, choose the desired width of the corridor (e.g. 4mm) and the border lines. | ||
Revision as of 15:42, 22 May 2018
Learn how to make o-technical excercises.
Preparation
For a course setting project, you need two OCAD files:
- A Course Setting file
Like map files it has the extension .ocd, but it has a special internal mark to identify it as a course setting file.
- A Map file
This is your OCAD map which will be loaded as Background map for the Course Setting Project.
![]() You can also load a raster image (PNG, JPG, ...) as background map. However, not all trainings described on this page will work if you don't have an OCAD Map File.
You can also load a raster image (PNG, JPG, ...) as background map. However, not all trainings described on this page will work if you don't have an OCAD Map File.
Now start a New Coure Setting Project.
Simple Course
- Make sure the map scale of your Course Setting file is the same as your Map file
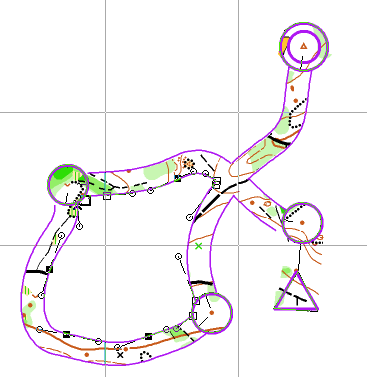
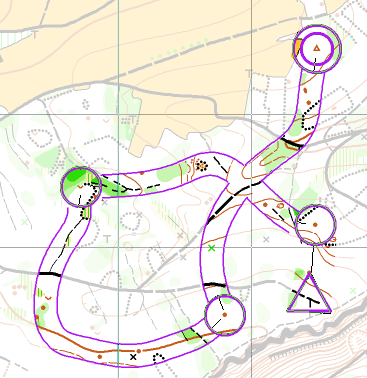
Corridor
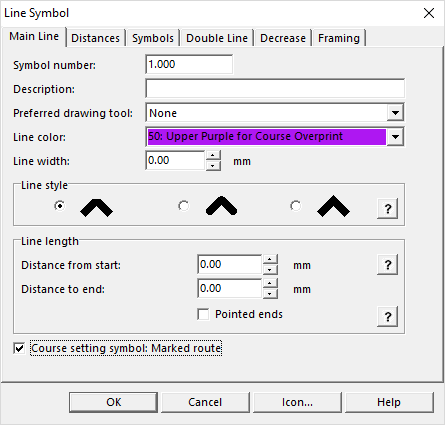
- Course Setting Choose New in the Symbol Menu and create a new Line Symbol.
- - In the Mail Line tab, activate Course setting symbol: Marked route
- - In the Double Line tab, choose the desired width of the corridor (e.g. 4mm) and the border lines.
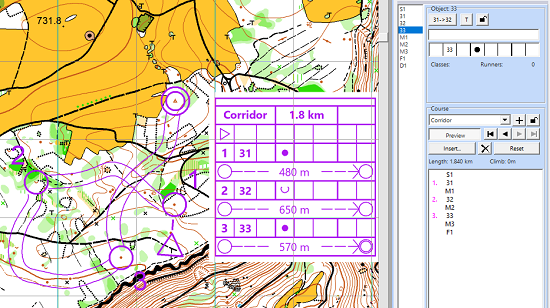
- Draw your corridor. Each corridor will appear as a Mared Route in the Course Setting Box. Insert the corridors in your course.
- Edit your corridor in a next step.
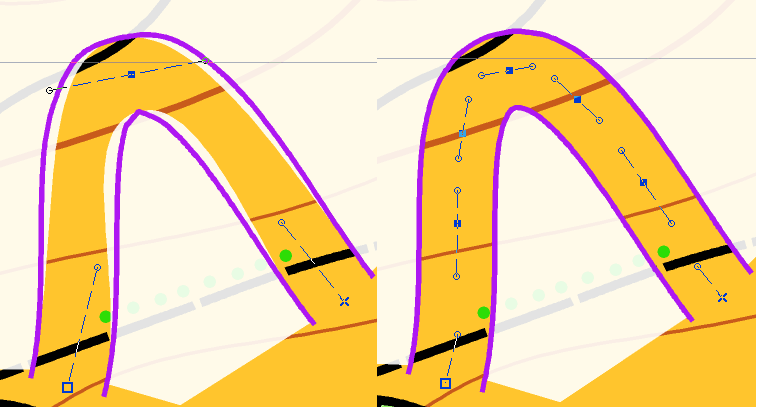
- - Cut overlapping parts.
- - Insert additional vertices in sharp turns.
- Cover the remaining parts with white
- - Use the White background (Symbol 760) and the Follow existing objects
- - Activate Follow existing objects under Options> OCAD Preferences> Drawin and Editing to enable line following for double lines (hold the Ctrl button).
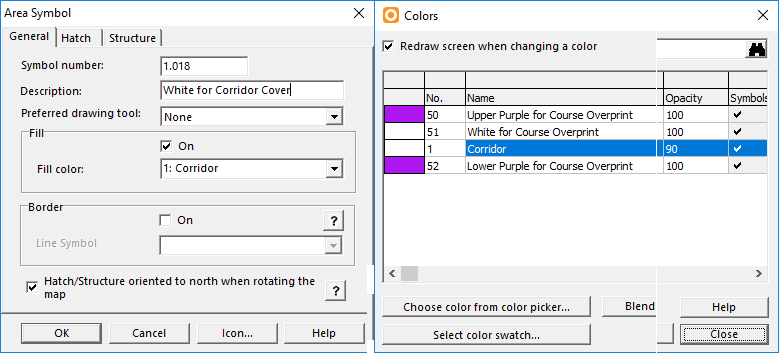
- - Instead of using White background for covering, first define a new white color (Map>Colors>Add) and then create a new area symbol (Symbol>New>Area Symbol) where you use this color as Fill Color. Like this you can set the Opacity of the white color to e.g. 90%, so you are not completly lost when leaving the corridor.
