Insert Glyphs: Difference between revisions
Jump to navigation
Jump to search
No edit summary |
No edit summary |
||
| Line 1: | Line 1: | ||
[[File:Pro40px.PNG|This function is available in OCAD Professional.|link=https://www.ocad.com/en/products/ocad-for-cartography]] | [[File:Pro40px.PNG|This function is available in OCAD Professional.|link=https://www.ocad.com/en/products/ocad-for-cartography]]<br><br> | ||
The function '''Insert glyphs''' can be used to insert '''special characters''' into your text objects. | |||
# To insert glyphs change the '''Font''' in the '''[[Create_a_New_Symbol#Create_a_New_Text_Symbol|Text Symbol]]''' dialog box into a font which supports the required glyphs. | # To insert glyphs change the '''Font''' in the '''[[Create_a_New_Symbol#Create_a_New_Text_Symbol|Text Symbol]]''' dialog box into a font which supports the required glyphs. | ||
# Select an existing text object and set the cursor to the position you want to insert a glyph. | # Select an existing text object and set the cursor to the position you want to insert a glyph. | ||
Revision as of 09:15, 17 November 2016
The function Insert glyphs can be used to insert special characters into your text objects.
- To insert glyphs change the Font in the Text Symbol dialog box into a font which supports the required glyphs.
- Select an existing text object and set the cursor to the position you want to insert a glyph.
- Choose the Insert Glyphs command from the Object menu.
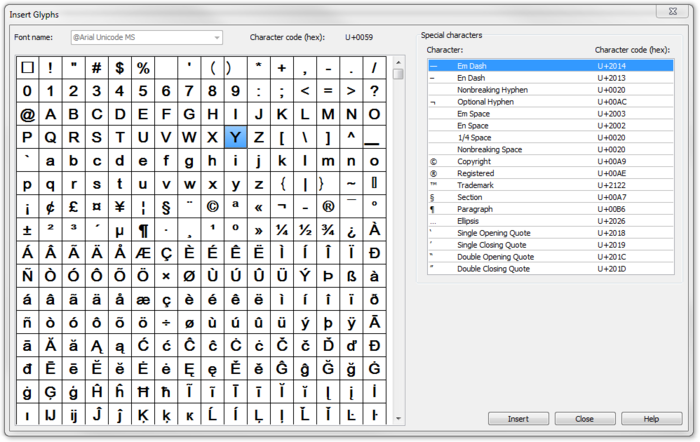
- The Insert Glyps dialog box appears:
- Double click on a character to add it or select a character and click the Insert button.
- Click the Close button to quit this dialog.
![]() -Only characters that are included in the character set can be added.
-Only characters that are included in the character set can be added.
![]() -Add special characters on the right side of the dialog.
-Add special characters on the right side of the dialog.
![]() -Glyphs can also be used in layout text objects.
-Glyphs can also be used in layout text objects.
Back to the Edit Object page.
