Insert Glyphs
Jump to navigation
Jump to search
- To insert glyphs change the Font in the Text Symbol dialog box into a font which supports the required glyphs.
- Select an existing text object and set the cursor to the position you want to insert a glyph.
- Choose the Insert Glyphs command from the Object menu.
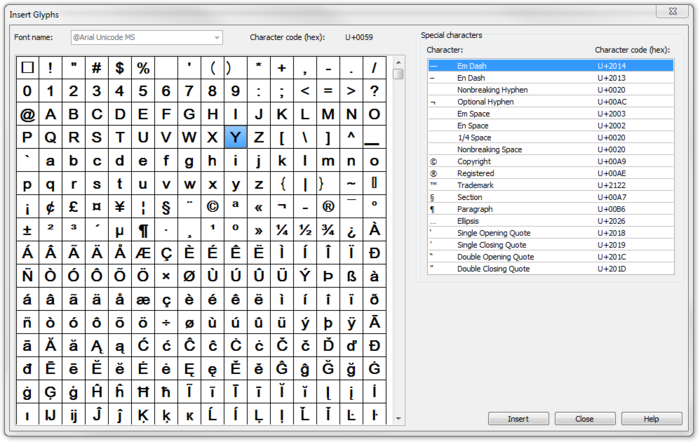
- The Insert Glyps dialog box appears:
- Double click on a character to add it or select a character and click the Insert button.
- Click the Close button to quit this dialog.
![]() -Only characters that are included in the character set can be added.
-Only characters that are included in the character set can be added.
![]() -Add special characters on the right side of the dialog.
-Add special characters on the right side of the dialog.
![]() -Glyphs can also be used in layout text objects.
-Glyphs can also be used in layout text objects.
Back to the Edit Object page.
