Create a New Line Text Symbol
You can create different line text symbols with OCAD.
Choose the New command in the Symbol menu. Then, choose the Line Text Symbol option in the New Symbol dialog to create a new line text symbol.
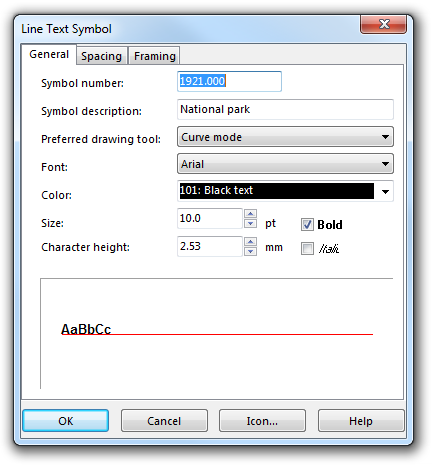
The Line Text Symbol dialog appears. The following options are available:
- General: Used to define the font color, type and size.
- Spacing: Used to define the letters, word spacing and text positioning.
- Framing: Used to define the framing
General
The General tab provides adjustment options for the font, color, size etc. of line text symbols. At the bottom of the dialog a preview of the text is shown.
![]() For every text style, a separate symbol is required. If you modify the line text symbol, then all text written with that symbol will change.
For every text style, a separate symbol is required. If you modify the line text symbol, then all text written with that symbol will change.
![]() The error message: "Font not found" appears if a font is chosen that is not installed on the PC. The font needs to be installed on the PC or another font must be chosen. Otherwise the font Arial is used.
The error message: "Font not found" appears if a font is chosen that is not installed on the PC. The font needs to be installed on the PC or another font must be chosen. Otherwise the font Arial is used.
Symbol Number
Type a symbol number between 0.001 and 999999.999 in this field.
Symbol Description
Enter a symbol description in this field (e.g. River Name).
Font
Choose a font for the text symbol. All TrueType fonts installed in Windows are listed in the dropdown box. You cannot use raster fonts or Adobe Type Manager fonts.
Color
Choose the color for the text. All colors from the Color Table are listed in the dropdown list.
Size
Choose the size in points for the text. As an alternative you can enter the character height in millimeters in the Character height field.
Character Height
Enter here the height of the character 'B' in millimeters. Alternatively, you can enter the size of the font in points in the Size field.
Emphasis
- Bold: Check this box for bold text.
- Italic: Check this box for italic text.
Spacing
Choose this page to define spacing and alignment for a line text symbol.
Character Spacing
Enter here a distance to be inserted between characters. If you enter 100%, a space character is inserted between characters. The default value is 0%. Negative values can be inserted, too.
Word Spacing
Enter here the distance between words. 100% means that a normal space character is used between words. The default value is 100%.
Alignment
Choose here how the text is aligned along the line. The All line options (Those three on the right side) mean that the text is distributed along the entire line. With this option the letter-spacing will be adapted to the length of the line text object. Choose the options from Bottom to Top and Left to Right for a normal alignment (not justified).
Framing
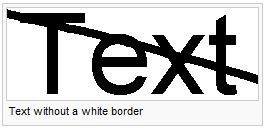
Choose this page to set the parameters for text framing. Text framing is a method to make text more readable on maps. If - for instance - you have black text on a map, it may interfere with black line objects. Text framing can also be used for decorative effects - giving the text a shadow, for instance.
For text framing you need to understand the Color Table and you should have some experience in creating new colors and new symbols.
Off
Activate this box if you don't want to use text framing.
Line
Enter here the Width (how much the framing extends outside the character) of the text framing as well as the Line style (how corners and line ends appear) and the Color at the bottom of the Mode part of the dialog (all colors from the Color Table are listed here). To get text framing, this color must be below the color of the main font in the Color Table, but above the colors of any objects which you wish to cover.
Shadow
Choose this option if a shadow to the text shall be rendered. Enter the Horizontal and Vertical offset of the shadow. Choose a Color at the bottom of the Mode part of the dialog (all colors from the Color Table are listed here). To get text framing, this color must be below the color of the main font in the Color Table, but above the colors of any objects which you wish to cover.
Drawing a Line Text Symbol
Line text symbols are used for text along curved lines. Line text can be written along any line, including curved lines. To draw a line text object you must define a line text symbol and do the following steps:
- Select the line text symbol.
- Draw a line in any drawing mode (curve, ellipse, circle etc.).
- After terminating the line, an insertion line appears and you can directly type the text on the keyboard.
- If the text goes in the wrong direction, click the
Reverse Object icon in the Edit Functions toolbar.
Icon
Click the Icon button in the dialog to create an icon for the symbol. The Icon Editor appears. Read more about this editor in the Icon Editor article.
Back to the Create a New Symbol page.


